To determine if the instructions below apply to you, navigate to Data Manager > Create a Connection > Amazon S3 and select IAM Role in the Authentication Type field. If the External ID and IAM Role ARN fields appear, refer to the new S3 documentation instead.
IAM Role-based authentication for Amazon S3 ingestion (Previous Version)
StarTree Enterprise Edition allows users to ingest data from Amazon S3 using IAM role-based authentication. This page covers how to import data from an Amazon S3 bucket into a Pinot table when:
- (Cross-account) the ingested S3 bucket is in a different AWS account than the StarTree DataPlane
- (Same-account) the ingested S3 bucket is in the same AWS account as the StarTree DataPlane
Cross-account S3-bucket access and data ingestion
For BYOC users Often, the ingestion S3 bucket is in a different AWS Account (say Account A) than where the ingestion job / Startree Data Plane runs (say Account B). In such scenarios, AWS recommends the use of cross-account access as described in this article (opens in a new tab).
For (Dedicated) SaaS users Often, the ingestion S3 bucket is in a different AWS Account (say Account A - This is owned by SaaS user) than where the ingestion job / Startree Data Plane runs (say Account B - This is owned by StarTree). For (Dedicated) SaaS users, follow steps 1 and 2 below. For 3 and 4, reach out to StarTree Support (owner of Account B in this example).
In such scenarios, AWS recommends the use of cross-account access as described in this article (opens in a new tab).
The following steps need to be taken in order to ingest data from a cross-account S3 bucket into a StarTree Data Plane:
1. EC2 Instance Profile Role ARN
Grab the EC2 Instance Profile Role ARN from Data Manager UI when you create a new Dataset.
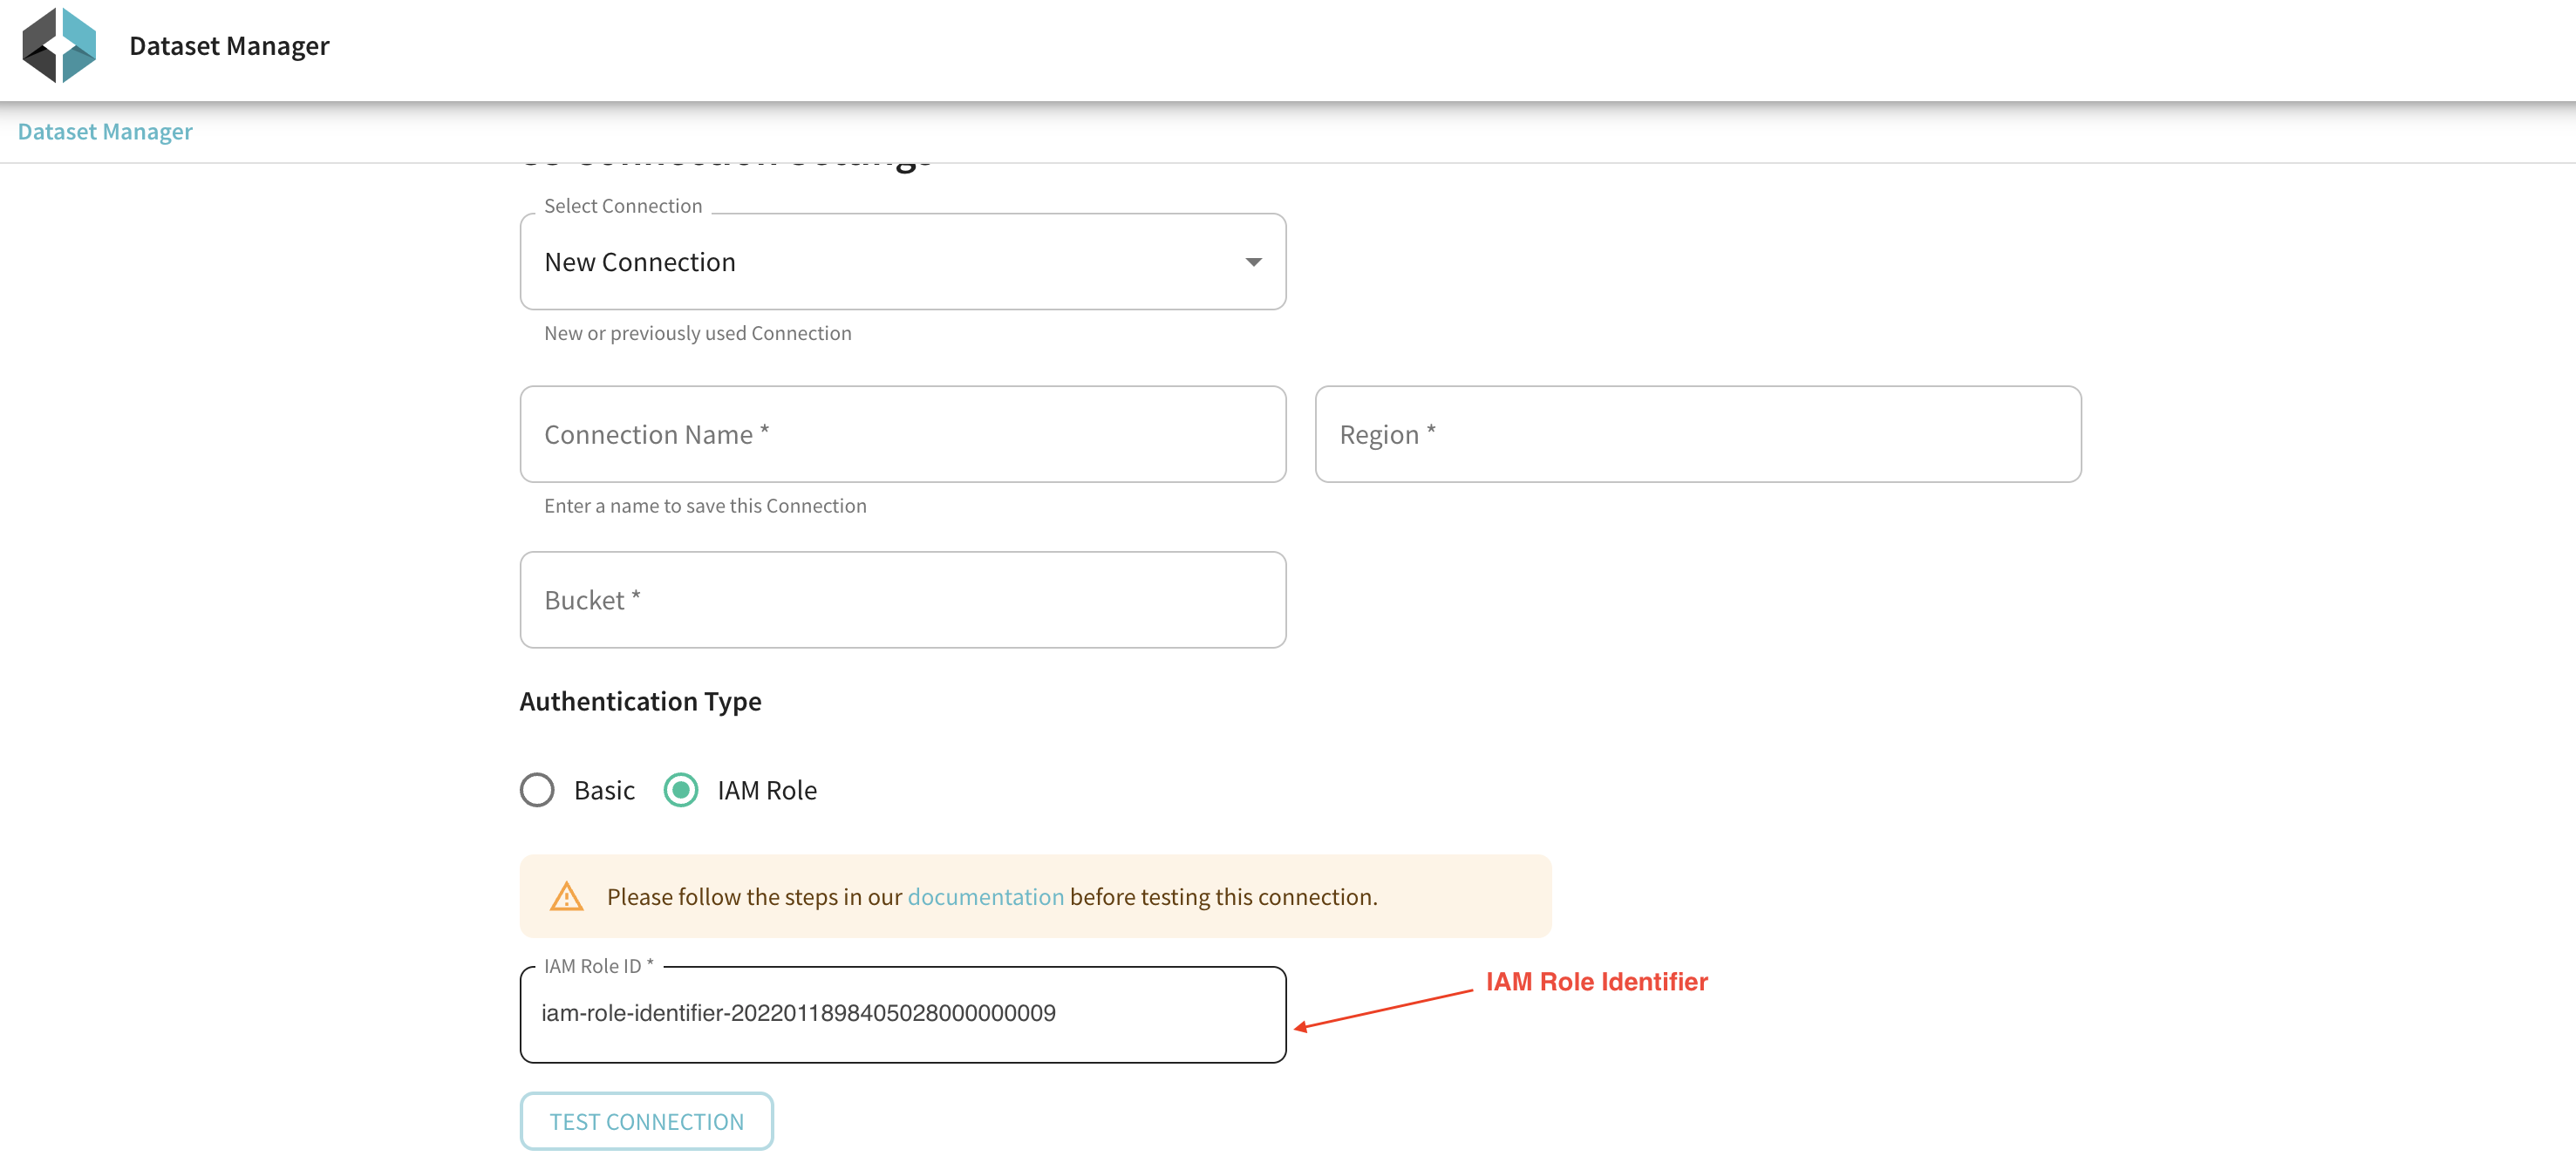
This role is auto-created by startree during the environment provisioning and deployment.
Reach out to the admin of Account B to get the <AccountB_Number> (in the following sample policy snippet)
If you are using the StarTree SaaS version - reach out to your StarTree customer support team to get <AccountB_Number> (in the following sample policy snippet).
Link to locate AWS account number (opens in a new tab)
Use the IAM Role ID in the above picture as <AccountB_RoleArn> in the following sample poicly snippet
2. (Account A) >> Create a bucket policy
The bucket owner creates a bucket policy to provide access to the ec2 instance profile role noted from step #1.
Sample Policy:
{
  "Version": "2012-10-17",
  "Statement": [
    {
      "Sid": "Statement1",
      "Principal": {
        "AWS": ["arn:aws:iam::<AccountB_Number>:role/<AccountB_RoleArn>"] },
      "Effect": "Allow",
      "Action": [
        "s3:List*",
        "s3:GetObject"
      ],
      "Resource": [
        "arn:aws:s3:::<my-bucket>",  "arn:aws:s3:::<my-bucket>/*"
      ]
    }
  ]
}
Reach out to the admin of Account B for steps 3 and 4.
If you are using the StarTree SaaS version, reach out to your StarTree customer support team.
3.(Account B) >> Create an IAM policy to allow access to the ingestion S3 bucket
Admin of Account B should create an S3 policy with required permissions to the source bucket.
Sample Snippet:
{
    "Version": "2012-10-17",
    "Statement": [
        {
            "Effect": "Allow",
            "Action": [
                "s3:List*",
                "s3:GetObject"
            ],
            "Resource": [
                "arn:aws:s3:::<my-bucket>", "arn:aws:s3:::<my-bucket>/*"
            ]
        }
    ]
}
With CLI
aws --profile ${CLUSTER_NAME} iam --region ${REGION} create-policy --policy-name devrel-demos-policy --policy-document file://devrel-demos-policy.json4. (Account B) >> Attach the policy to the EC2 instance role
Admin of Account B attaches the S3 policy created in previous step to the EC2 Instance Role discovered in Step 1.
With CLI
aws --profile ${CLUSTER_NAME} iam --region ${REGION} attach-role-policy --role-name sc-staging-startree-dev-ui-team20220113030258471200000009 --policy-arn arn:aws:iam::462173948356:policy/devrel-demos-policySame account S3 bucket access and data ingestion
When the ingestion S3 bucket is in the same AWS account as the ingestion job, all steps for accessing the S3 bucket via the IAM role can be taken by the account owner.
The following steps need to be taken in order to ingest data from an S3 bucket into a StarTree data plane:
1. EC2 Instance Profile Role ARN
Grab the EC2 Instance Profile Role ARN from Data Manager UI when you create a new Dataset.
This role is auto-created by startree during the environment provisioning and deployment.
2. Create an IAM policy for the S3 bucket
Create a new IAM Policy for the S3 bucket as shown below:
Sample Policy:
{
  "Version": "2012-10-17",
  "Statement": [
    {
      "Effect": "Allow",
      "Action": "s3:ListAllMyBuckets",
      "Resource": "*"
    },
    {
      "Effect": "Allow",
      "Action": [
        "s3:List*",
        "s3:ListBucket",
        "s3:GetObject"
      ],
      "Resource": [
        "arn:aws:s3:::<my-bucket>",
        "arn:aws:s3:::<my-bucket>/*"
      ]
    }
  ]
}
This policy can be set up via the AWS IAM console UI or via AWS Command Line (CLI).
Using AWS Console UI
-
Proceed to the AWS IAM dashboard and select
Policiesin the left menu bar.
-
Click on
Create Policyand copy the JSON policy definition.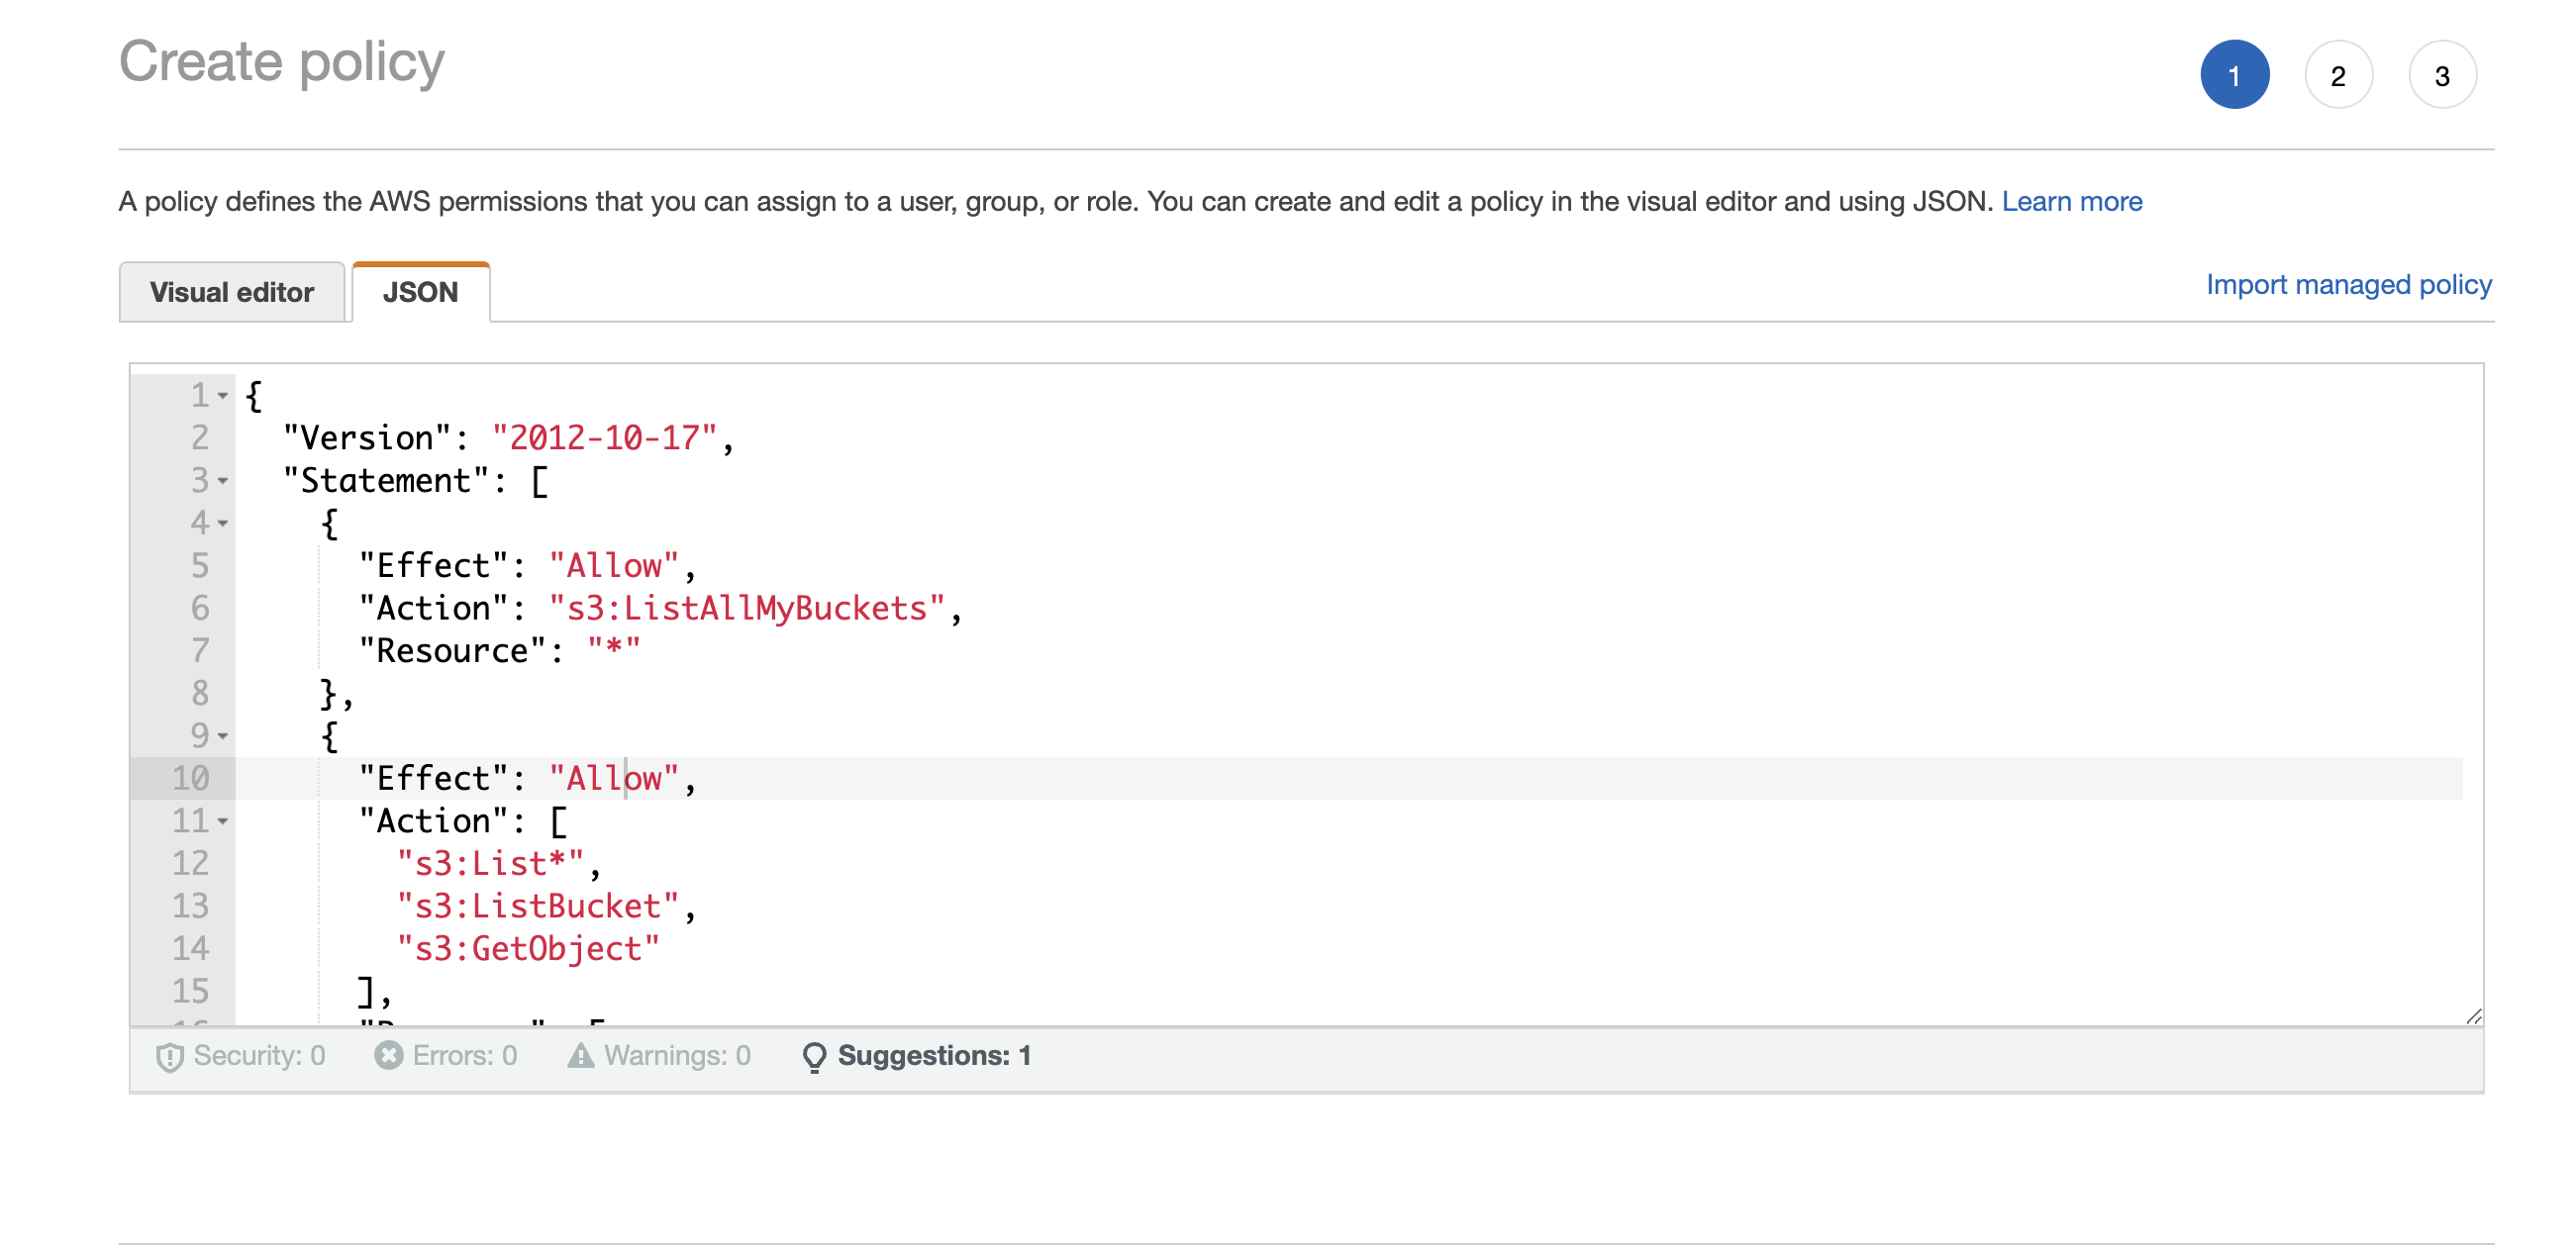
-
Click through
Tagsform and proceed to save your policy with a suitable name, such as${my-bucket}-policy.
Using the AWS CLI
- Save the policy in a file called
${my-bucket}-policy.json - Create the IAM policy
aws --profile ${CLUSTER_NAME} iam --region ${REGION} create-policy --policy-name ${my-bucket}-policy --policy-document file://${my-bucket}-policy.json3. Attach the IAM policy to the EC2 instance profile role
Attach the IAM policy defined in Step 2 to the EC2 instance profile role identified in Step 1. This can be done in AWS using the console UI or AWS command line.
Using the AWS console UI
-
Proceed to the AWS IAM dashboard and select
Rolesin the left menu bar.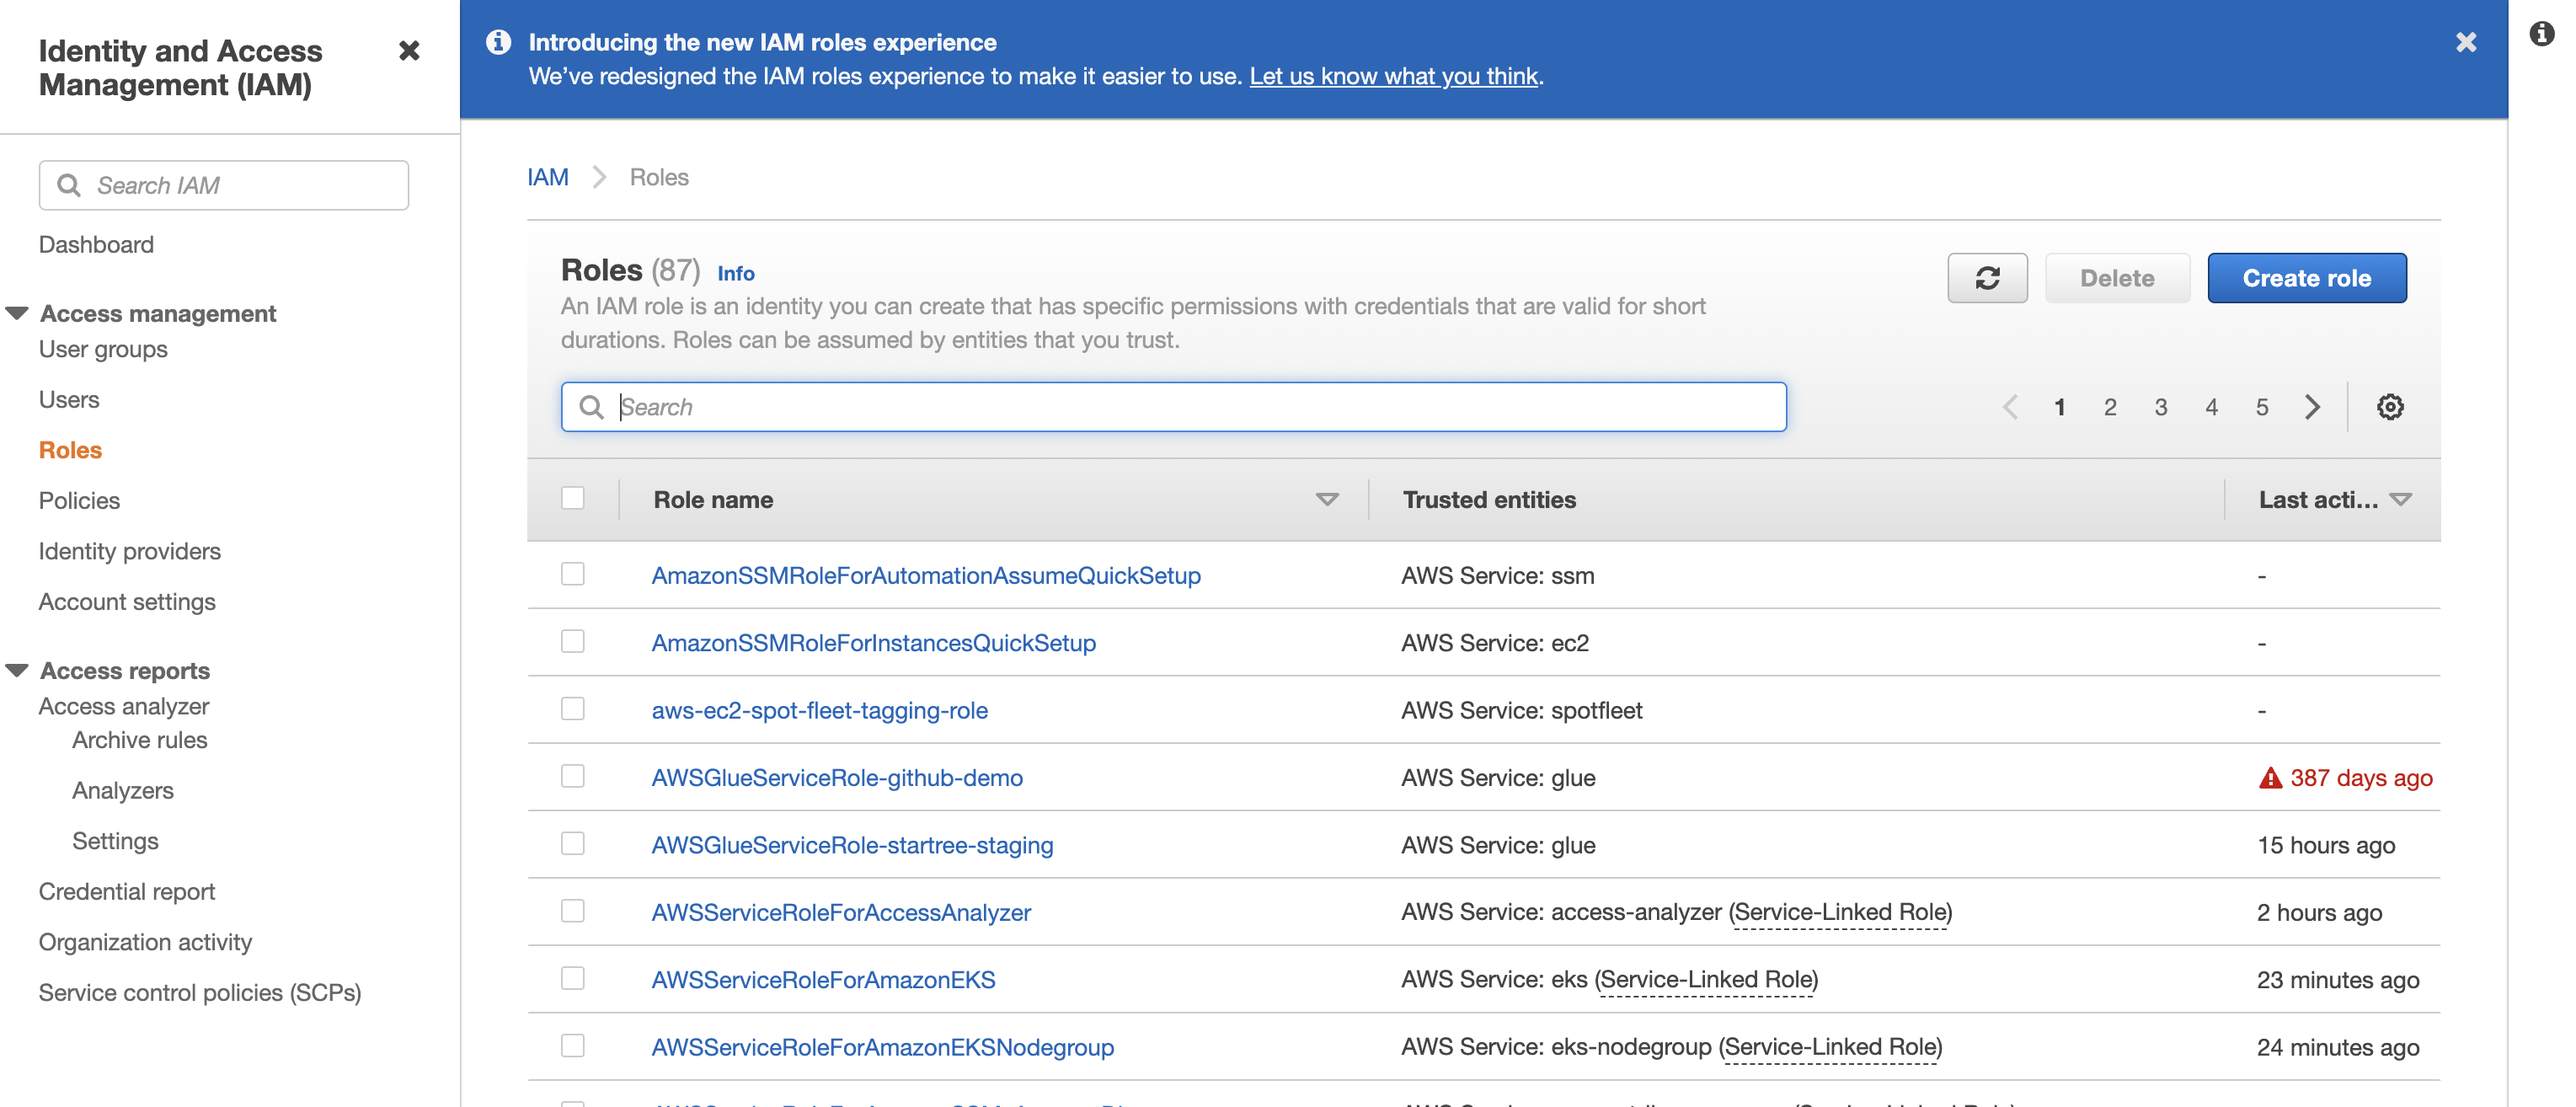
-
Search for the role identified in Step 1 and click on the role name.
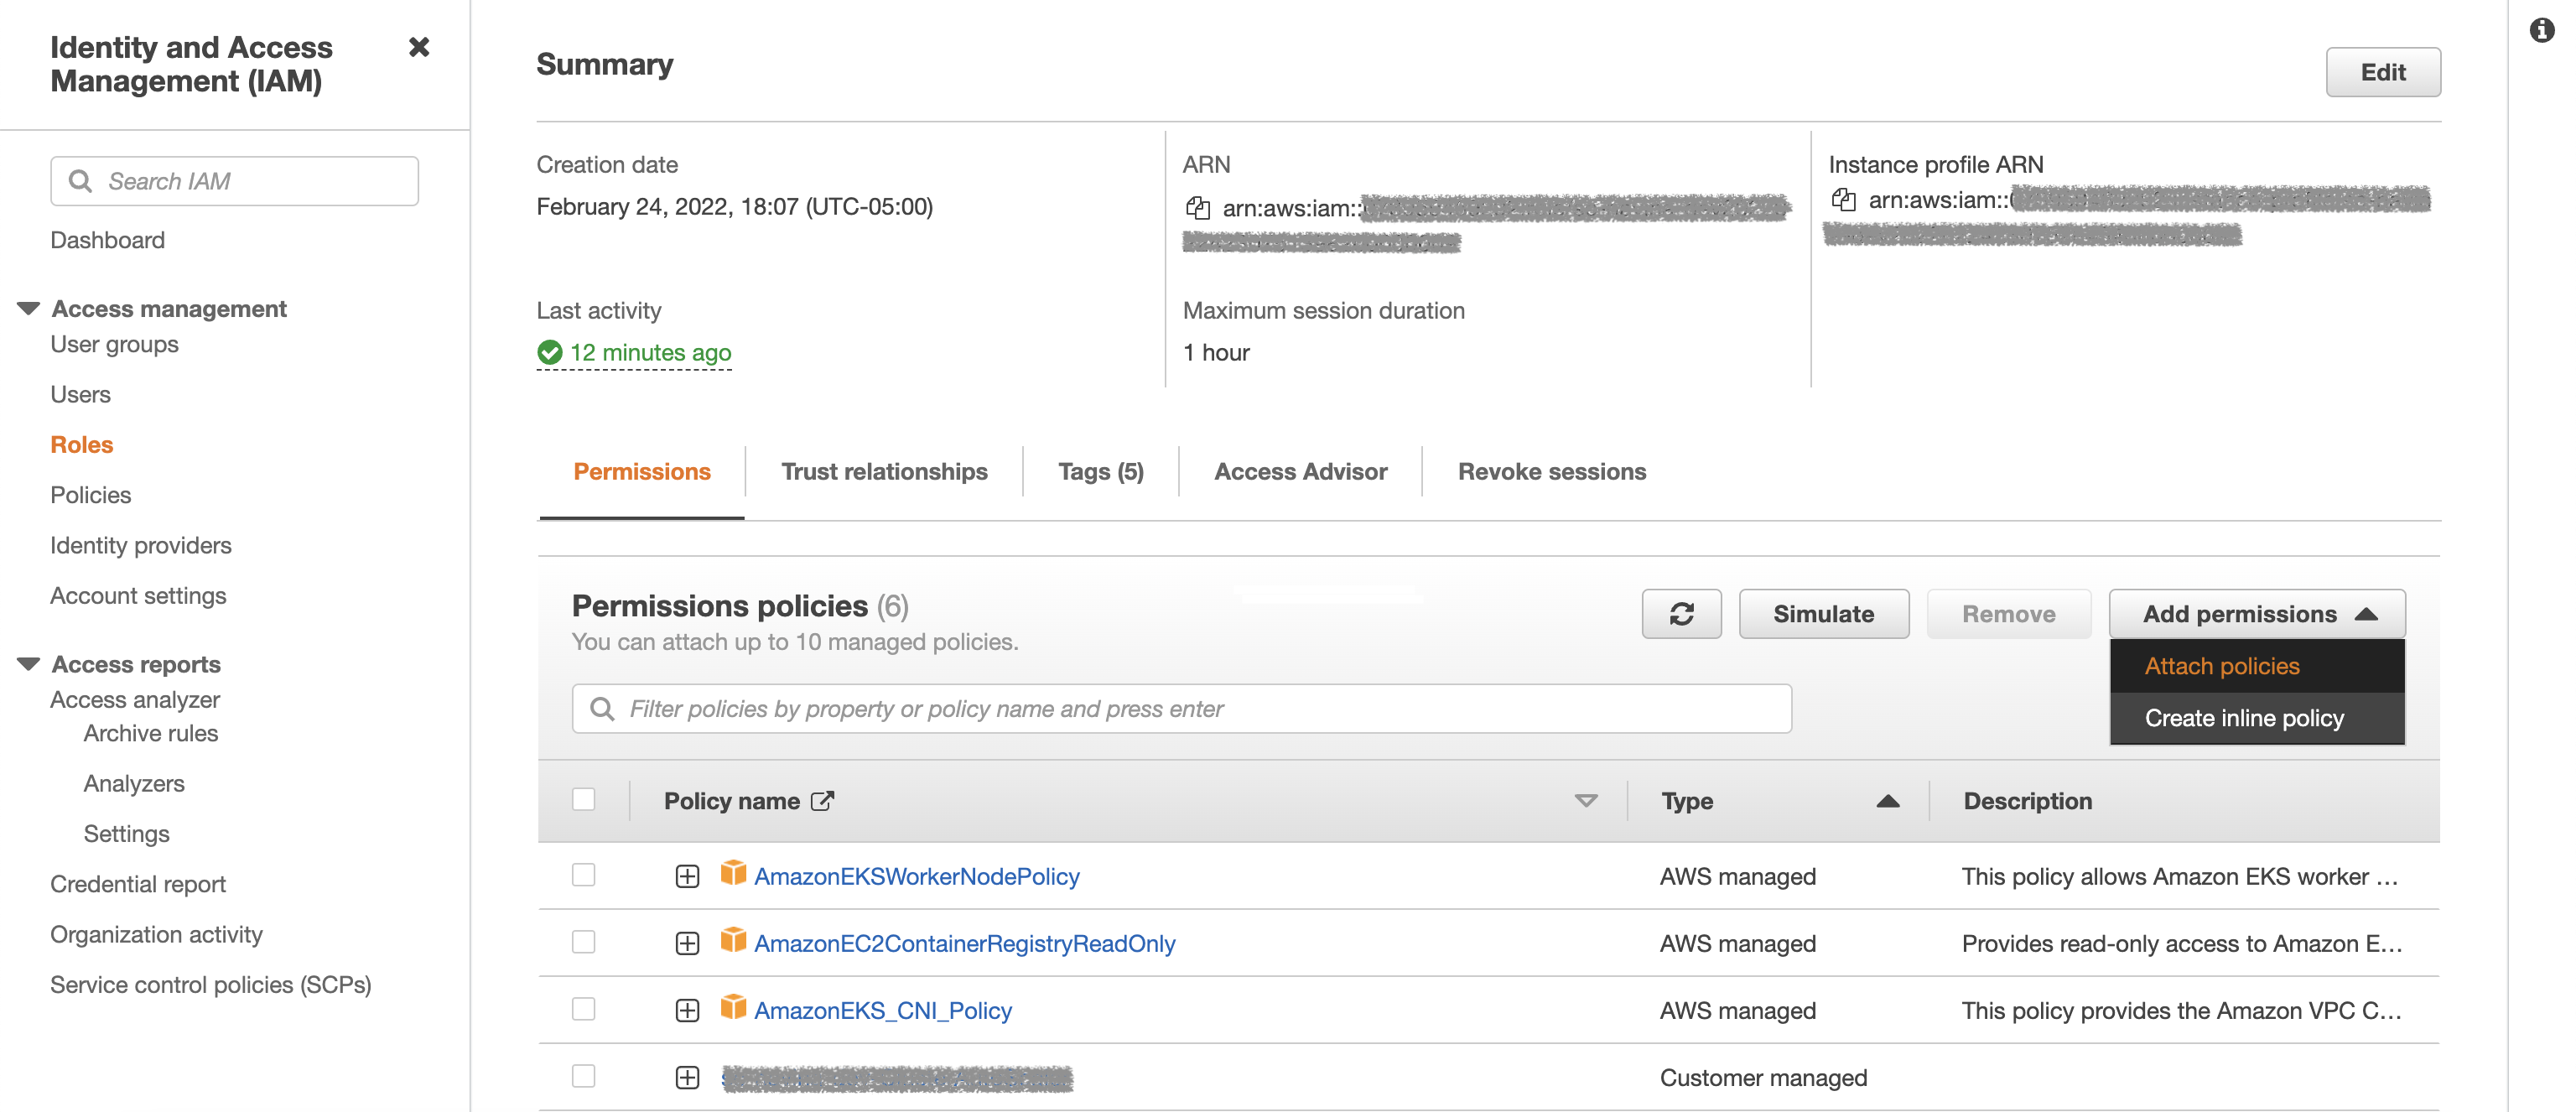
-
Under the permissions tab, click on
Add Permissions->Attach Policies.
Search for the policy${my-bucket}-policycreated in Step 2
Using the AWS CLI
aws --profile ${CLUSTER_NAME} iam --region ${REGION} attach-role-policy --role-name ${ROLE_NAME} --policy-arn ${my-bucket}-policy