Ingest from a streaming data source
In this guide you will learn how to import data from a streaming data set. You should have a local cluster up and running, following the instructions in Create Cluster
In this guide we'll learn how to ingest data from Kafka, a stream processing platform.
Install and Launch Kafka
Let's start by downloading Kafka to our local machine.
To pull down the latest Docker image, run the following command:
docker pull wurstmeister/kafka:latestNext we'll spin up a Kafka broker:
docker run \
    --network pinot-demo \
    --name=kafka \
    -e KAFKA_ZOOKEEPER_CONNECT=zookeeper:2181/kafka \
    -e KAFKA_BROKER_ID=0 \
    -e KAFKA_ADVERTISED_HOST_NAME=kafka \
    wurstmeister/kafka:latest
Data Source
We're going to generate some JSON messages from the terminal using the following script:
import datetime
import uuid
import random
import json

while True:
    ts = datetime.datetime.now().strftime("%Y-%m-%dT%H:%M:%S.%fZ")
    id = str(uuid.uuid4())
    count = random.randint(0, 1000)
    print(
        json.dumps({"ts": ts, "uuid": id, "count": count})
    )
datagen.py
If you run this script (python datagen.py), you'll see the following output:
{"ts": 1644586485807, "uuid": "93633f7c01d54453a144", "count": 807}
{"ts": 1644586485836, "uuid": "87ebf97feead4e848a2e", "count": 41}
{"ts": 1644586485866, "uuid": "960d4ffa201a4425bb18", "count": 146}
Ingesting Data into Kafka
Let's now pipe that stream of messages into Kafka, by running the following command:
python datagen.py |
docker exec -i kafka /opt/kafka/bin/kafka-console-producer.sh \
    --bootstrap-server localhost:9092 \
    --topic events;
We can check how many messages have been ingested by running the following command:
docker exec -i kafka kafka-run-class.sh kafka.tools.GetOffsetShell \
  --broker-list localhost:9092 \
  --topic events
Output
events:0:11940And we can print out the messages themselves by running the following command
docker exec -i kafka /opt/kafka/bin/kafka-console-consumer.sh \
  --bootstrap-server localhost:9092 \
  --topic events
Output
...
{"ts": 1644586485807, "uuid": "93633f7c01d54453a144", "count": 807}
{"ts": 1644586485836, "uuid": "87ebf97feead4e848a2e", "count": 41}
{"ts": 1644586485866, "uuid": "960d4ffa201a4425bb18", "count": 146}
...
Schema
A schema defines what fields are present in the table along with their data types in JSON format.
Create a file called /tmp/pinot/schema-stream.json and add the following content to it.
{
  "schemaName": "events",
  "dimensionFieldSpecs": [
    {
      "name": "uuid",
      "dataType": "STRING"
    }
  ],
  "metricFieldSpecs": [
    {
      "name": "count",
      "dataType": "INT"
    }
  ],
  "dateTimeFieldSpecs": [{
    "name": "ts",
    "dataType": "TIMESTAMP",
    "format" : "1:MILLISECONDS:EPOCH",
    "granularity": "1:MILLISECONDS"
  }]
}
Table Config
A table is a logical abstraction that represents a collection of related data. It is composed of columns and rows (known as documents in Pinot). The table config defines the table's properties in JSON format.
Create a file called /tmp/pinot/table-config-stream.json and add the following content to it.
{
  "tableName": "events",
  "tableType": "REALTIME",
  "segmentsConfig": {
    "timeColumnName": "ts",
    "schemaName": "events",
    "replicasPerPartition": "1"
  },
  "tenants": {},
  "tableIndexConfig": {
    "loadMode": "MMAP",
    "streamConfigs": {
      "streamType": "kafka",
      "stream.kafka.consumer.type": "lowlevel",
      "stream.kafka.topic.name": "events",
      "stream.kafka.decoder.class.name": "org.apache.pinot.plugin.stream.kafka.KafkaJSONMessageDecoder",
      "stream.kafka.consumer.factory.class.name": "org.apache.pinot.plugin.stream.kafka20.KafkaConsumerFactory",
      "stream.kafka.broker.list": "kafka:9092",
      "realtime.segment.flush.threshold.rows": "0",
      "realtime.segment.flush.threshold.time": "24h",
      "realtime.segment.flush.threshold.segment.size": "50M",
      "stream.kafka.consumer.prop.auto.offset.reset": "smallest"
    }
  },
  "metadata": {
    "customConfigs": {}
  }
}
Create schema and table
Create the table and schema by running the appropriate command below:
docker run --rm -ti \
  --network=pinot-demo \
  -v /tmp/pinot:/tmp/pinot \
  apachepinot/pinot:1.0.0 AddSchema \
  -schemaFile /tmp/pinot/schema-stream.json \
  -tableConfigFile /tmp/pinot/table-config-stream.json \
  -controllerHost pinot-controller \
  -controllerPort 9000 -exec
Querying
Navigate to localhost:9000/#/query (opens in a new tab) and click on the events table to run a query that shows the first 10 rows in this table.
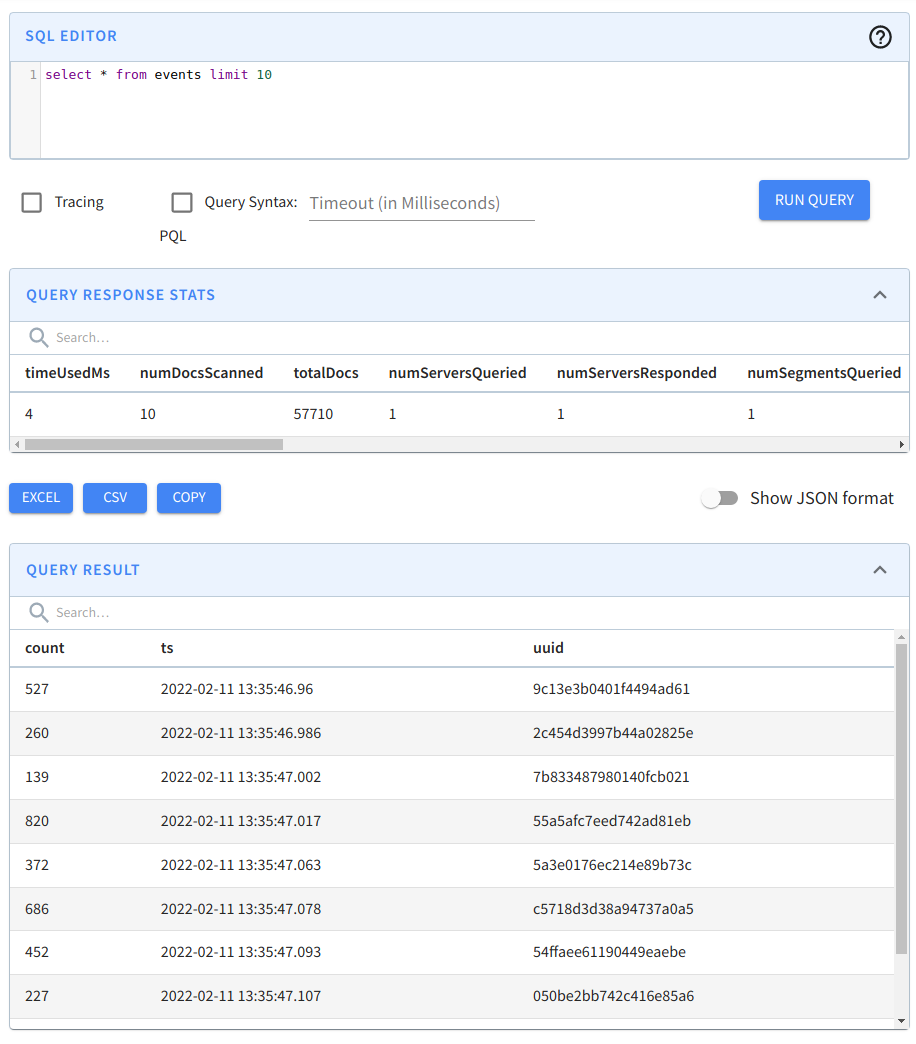 Querying the events table