Ingest from a batch data source
In this guide you will learn how to import data from a batch data set. You should have a local cluster up and running, following the instructions in Create Cluster
Although Pinot is most commonly used for real-time analytics on streaming data, batch data ingestion is still needed to back fill data or retrospectively fix data ingested from a streaming source.
In this guide we'll learn how to import CSV files from our local machine into Apache Pinot.
Data Source
Our CSV file contains the exam results for some students.
Create a file called /tmp/pinot/exams.csv and add the following content to it.
studentID,firstName,lastName,gender,subject,score,timestampInEpoch
200,Lucy,Smith,Female,Maths,3.8,1570863600000
200,Lucy,Smith,Female,English,3.5,1571036400000
201,Bob,King,Male,Maths,3.2,1571900400000
202,Nick,Young,Male,Physics,3.6,1572418800000
Schema
A schema defines what fields are present in the table along with their data types in JSON format.
Create a file called /tmp/pinot/schema.json and add the following content to it.
{
  "schemaName": "exams",
  "dimensionFieldSpecs": [
    {
      "name": "studentID",
      "dataType": "INT"
    },
    {
      "name": "firstName",
      "dataType": "STRING"
    },
    {
      "name": "lastName",
      "dataType": "STRING"
    },
    {
      "name": "gender",
      "dataType": "STRING"
    },
    {
      "name": "subject",
      "dataType": "STRING"
    }
  ],
  "metricFieldSpecs": [
    {
      "name": "score",
      "dataType": "FLOAT"
    }
  ],
  "dateTimeFieldSpecs": [{
    "name": "timestampInEpoch",
    "dataType": "LONG",
    "format" : "1:MILLISECONDS:EPOCH",
    "granularity": "1:MILLISECONDS"
  }]
}
Table Config
A table is a logical abstraction that represents a collection of related data. It is composed of columns and rows (known as documents in Pinot). The table config defines the table's properties in JSON format.
Create a file called /tmp/pinot/table-config.json and add the following content to it.
{
  "tableName": "exams",
  "segmentsConfig" : {
    "timeColumnName": "timestampInEpoch",
    "timeType": "MILLISECONDS",
    "replication" : "1",
    "schemaName" : "transcript"
  },
  "tableIndexConfig" : {
    "invertedIndexColumns" : [],
    "loadMode"  : "MMAP"
  },
  "tenants" : {
    "broker":"DefaultTenant",
    "server":"DefaultTenant"
  },
  "tableType":"OFFLINE",
  "metadata": {}
}
Create schema and table
Create the table and schema by running the appropriate command below:
Docker
docker run --rm -ti \
    --network=pinot-demo \
    -v /tmp/pinot:/tmp/pinot \
    apachepinot/pinot:1.0.0 AddTable \
    -schemaFile /tmp/pinot/schema.json \
    -tableConfigFile /tmp/pinot/table-config.json \
    -controllerHost pinot-controller \
    -controllerPort 9000 -exec
Launcher Scripts
bin/pinot-admin.sh AddTable \
  -schemaFile /tmp/pinot/table-config.json
  -tableConfigFile /tmp/pinot/table-config.json
Job Spec
To ingest batch data into Pinot we'll need to create a job specification. In this file we'll indicate where the input data comes from, its format, where the data should be output, along with other properties.
Pinot tables are comprised of segments that contains a subset of rows for that table.
When we run an ingestion job, one segment will be created for each CSV file that matches the includeFileNamePattern in the job specification.
Create a file called /tmp/pinot/job-spec.yml and add the following content to it.
Docker
executionFrameworkSpec:
  name: 'standalone'
  segmentGenerationJobRunnerClassName: 'org.apache.pinot.plugin.ingestion.batch.standalone.SegmentGenerationJobRunner'
  segmentTarPushJobRunnerClassName: 'org.apache.pinot.plugin.ingestion.batch.standalone.SegmentTarPushJobRunner'
jobType: SegmentCreationAndTarPush
inputDirURI: '/tmp/pinot/'
includeFileNamePattern: 'glob:**/*.csv'
outputDirURI: '/tmp/pinot/segments/'
overwriteOutput: true
pinotFSSpecs:
  - scheme: file
    className: org.apache.pinot.spi.filesystem.LocalPinotFS
recordReaderSpec:
  dataFormat: 'csv'
  className: 'org.apache.pinot.plugin.inputformat.csv.CSVRecordReader'
  configClassName: 'org.apache.pinot.plugin.inputformat.csv.CSVRecordReaderConfig'
tableSpec:
  tableName: 'exams'
pinotClusterSpecs:
  - controllerURI: 'http://pinot-controller:9000'
pushJobSpec:
  pushParallelism: 2
  pushAttempts: 2
  pushRetryIntervalMillis: 1000
Launcher Scripts
executionFrameworkSpec:
  name: 'standalone'
  segmentGenerationJobRunnerClassName: 'org.apache.pinot.plugin.ingestion.batch.standalone.SegmentGenerationJobRunner'
  segmentTarPushJobRunnerClassName: 'org.apache.pinot.plugin.ingestion.batch.standalone.SegmentTarPushJobRunner'
jobType: SegmentCreationAndTarPush
inputDirURI: '/tmp/pinot/'
includeFileNamePattern: 'glob:**/*.csv'
outputDirURI: '/tmp/pinot/segments/'
overwriteOutput: true
pinotFSSpecs:
  - scheme: file
    className: org.apache.pinot.spi.filesystem.LocalPinotFS
recordReaderSpec:
  dataFormat: 'csv'
  className: 'org.apache.pinot.plugin.inputformat.csv.CSVRecordReader'
  configClassName: 'org.apache.pinot.plugin.inputformat.csv.CSVRecordReaderConfig'
tableSpec:
  tableName: 'exams'
pinotClusterSpecs:
  - controllerURI: 'http://localhost:9000'
pushJobSpec:
  pushParallelism: 2
  pushAttempts: 2
  pushRetryIntervalMillis: 1000
Execute the job spec file by running the appropriate command below.
Docker
docker run --rm -ti \
    --network=pinot-demo \
    -v /tmp/pinot:/tmp/pinot \
    apachepinot/pinot:1.0.0 LaunchDataIngestionJob \
    -jobSpecFile /tmp/pinot/job-spec.yml
Launcher Scripts
bin/pinot-admin.sh LaunchDataIngestionJob \
  -jobSpecFile /tmp/pinot/job-spec.yml
Querying
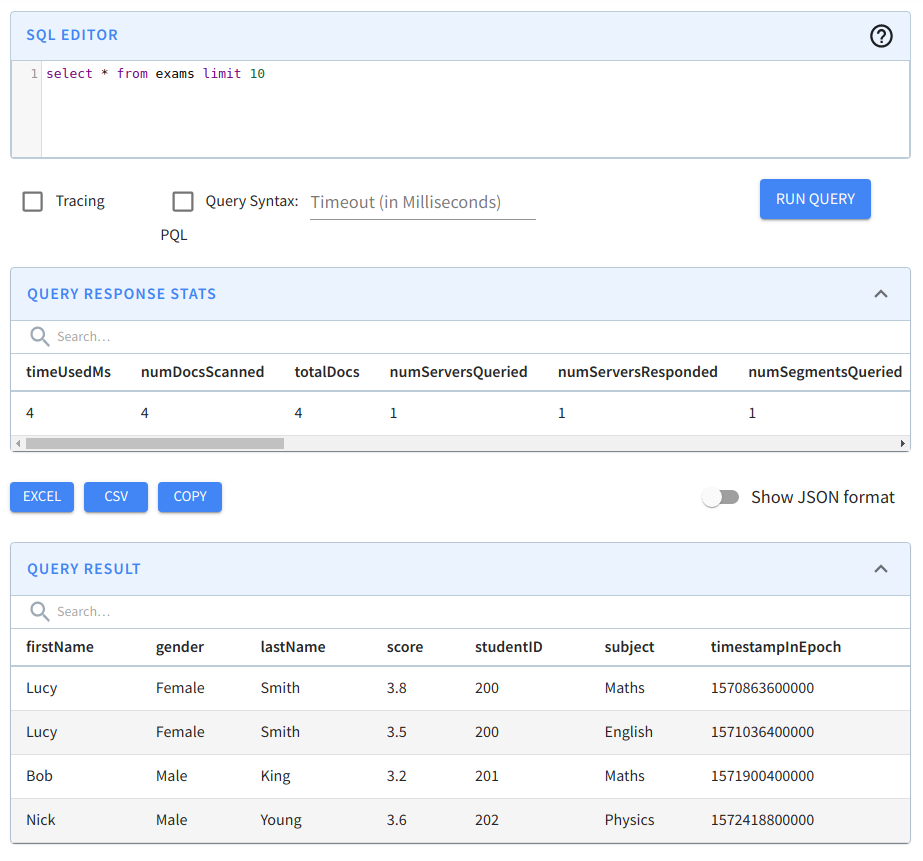
Navigate to localhost:9000/#/query (opens in a new tab) and click on the exams table to run a query that shows the first 10 rows in this table.
 Querying the exams table