Environments
In this guide we're going to learn how to create an environment. You will need to have configured a cloud provider.
Users of an organization may create as many environments as permitted by the quotas allowed by the cloud subscription reference attached the environment
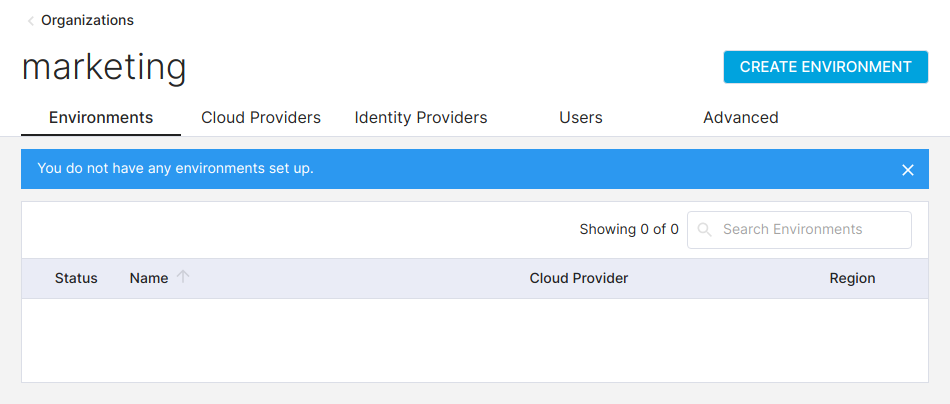 View organization
Click on Create environment and choose a name for the environment:
 Choose environment name
Once you've entered a name, click Next.
Select cloud provider
You will see the following screen, where you can configure the cloud provider:
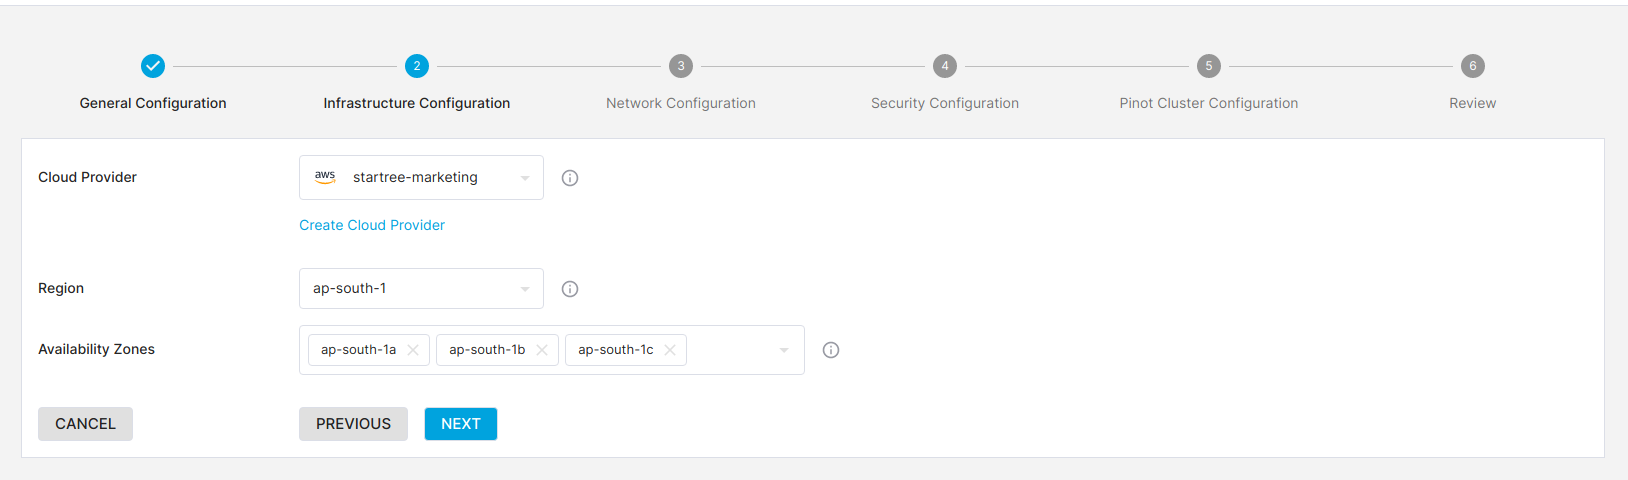 Configure cloud provider
Select the cloud provider created in the cloud provider guide. You'll also need to choose a region and availability zones for your StarTree Cloud cluster.
Then click Next.
Configure networking
You will now see the following screen, where you can adjust the network settings:
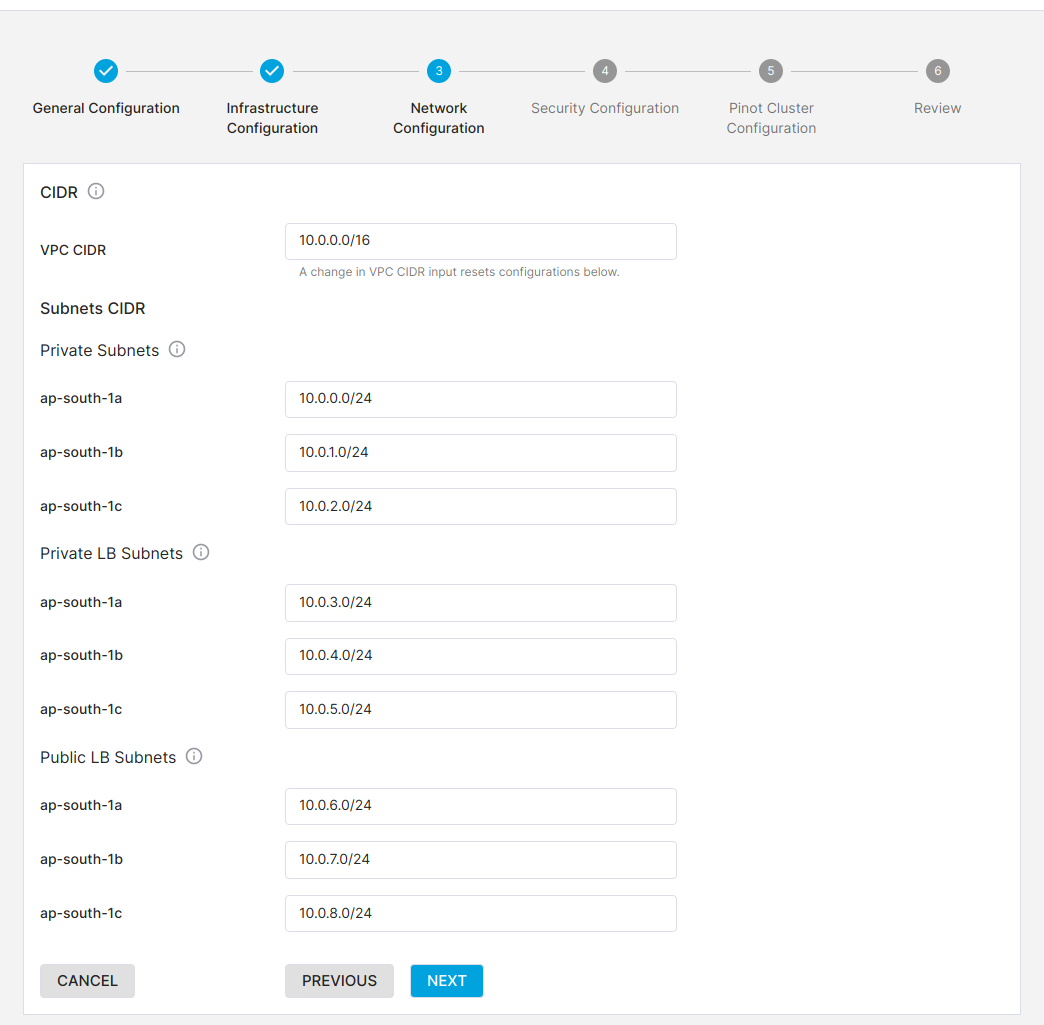 Configure networking
You'll need to configure the IP ranges to make sure that they don't conflict with other services running in your AWS estate, but if you don't have anything else running you can go ahead with the defaults. Click Next once you've made any changes.
Configure security
You will now see the following screen, where you can control access to the StarTree platform:
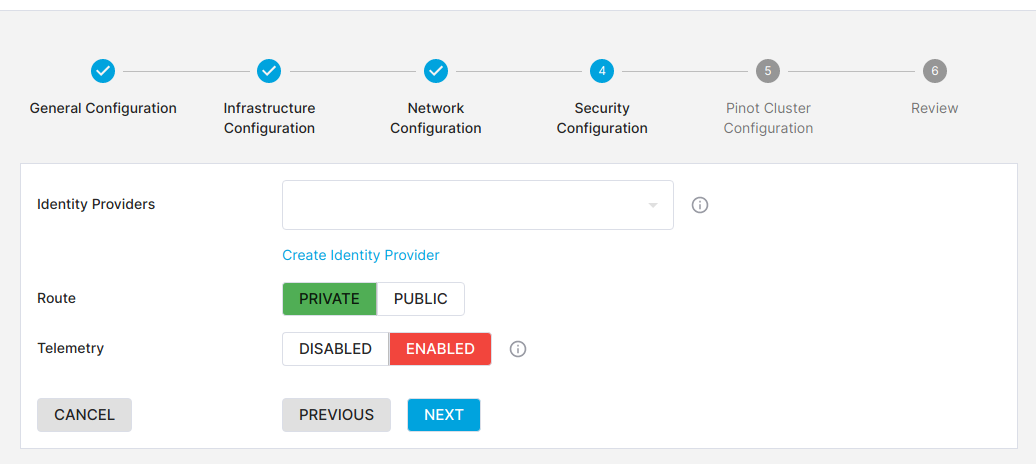 Configure security
Click Next.
Configure Pinot cluster
You will now see the following screen, where you can control access to the StarTree platform:
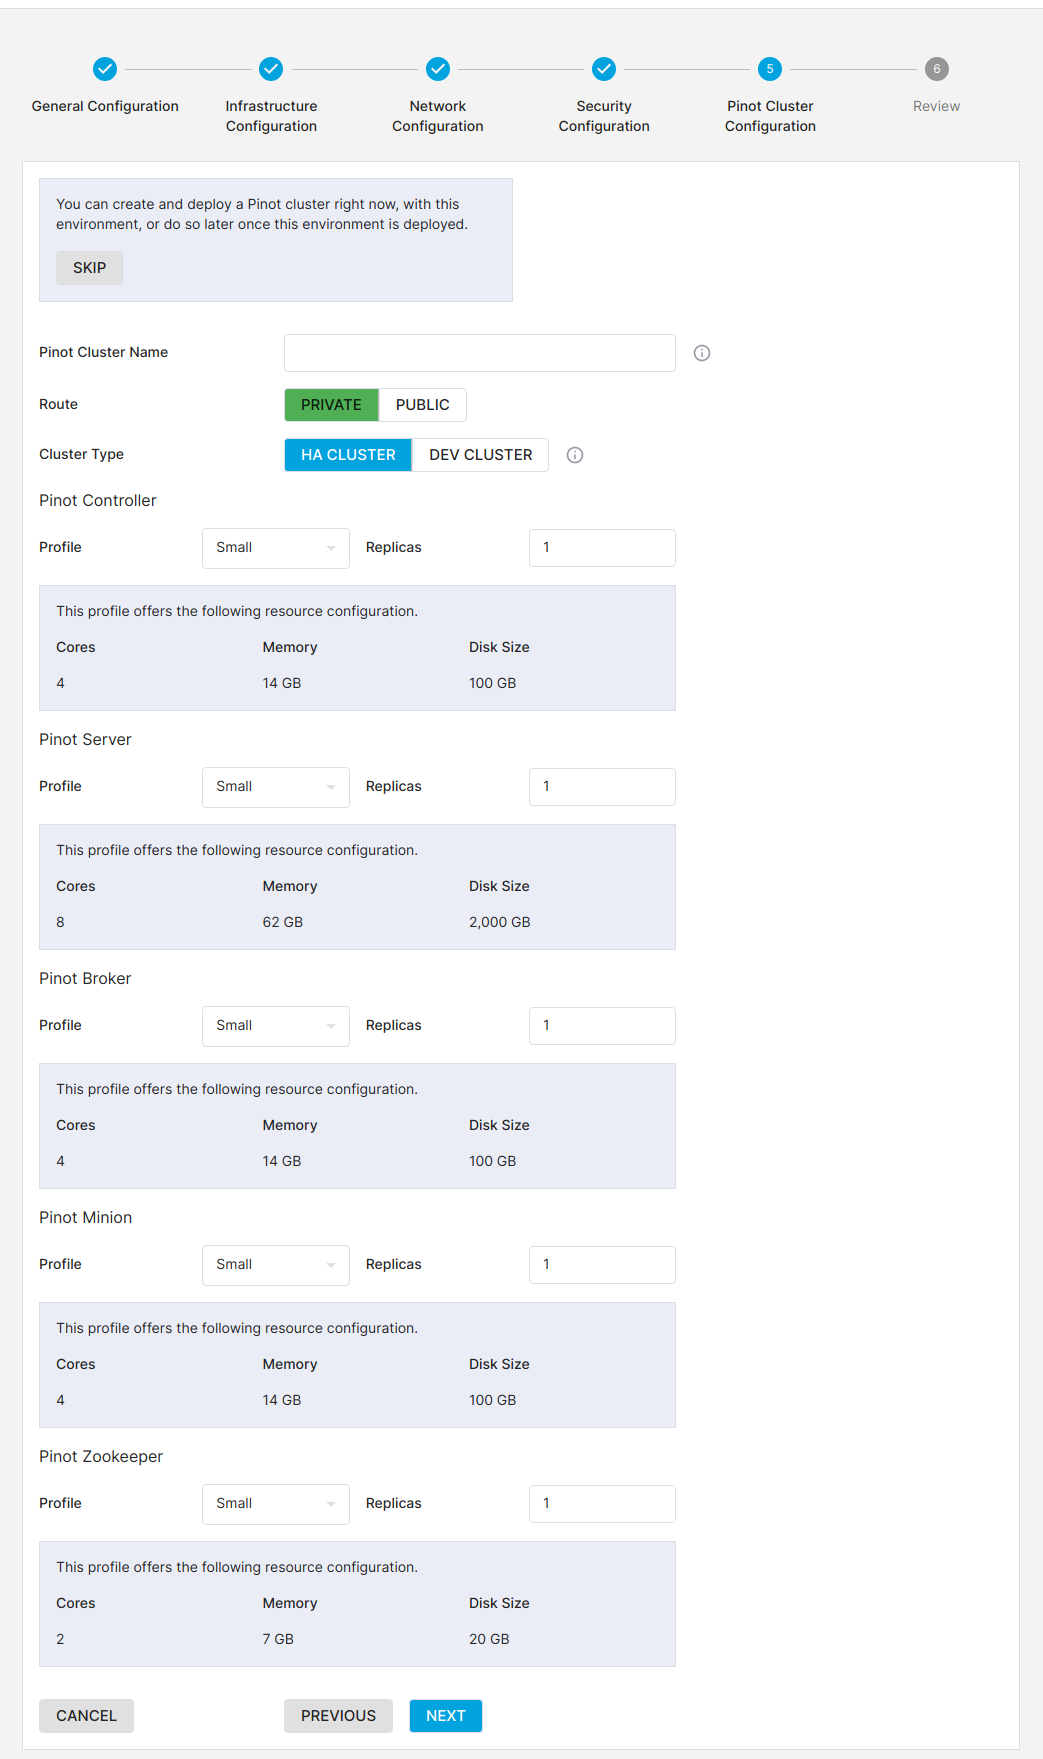 Configure Pinot cluster
Enter a cluster name, which must only contain alpha numeric characters.
If you want your Pinot cluster to be accessible externally, set Routing to public, otherwise leave it as private.
For a production use case you'll want to select a HA Cluster. You can then configure the number of Pinot Controllers, Pinot Servers, Pinot Brokers, and Pinot Zookeeper instances. If you're doing experiments or a proof of concept, a Dev Cluster should be sufficient.
Once you're happy with your selections, click Next to do one final check of all your config, or Skip to only review the environment config.
Review config
You will then see this screen if you clicked Skip:
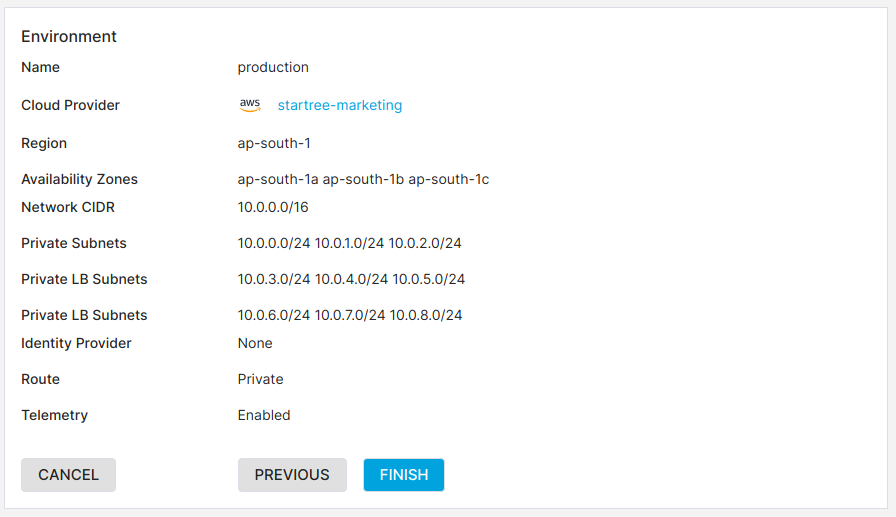 Review config (skip)
Or this screen if you clicked Next:
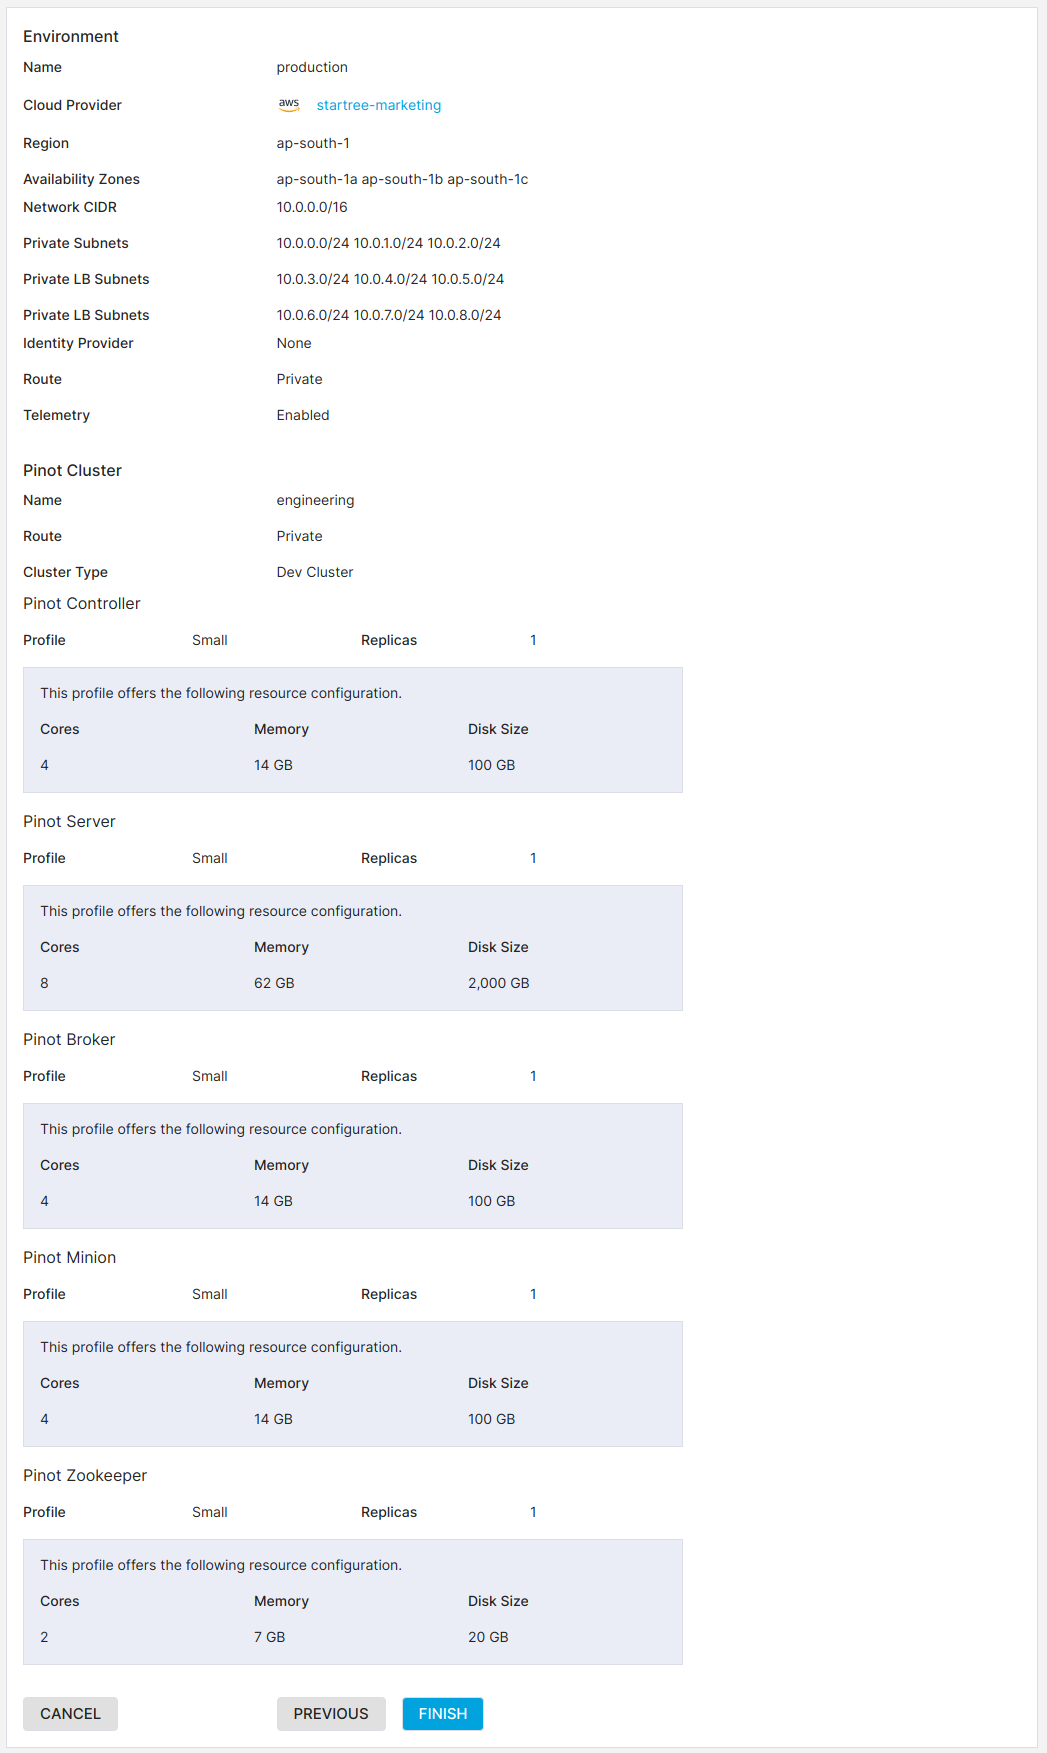 Review config
Once you've reviewed the config, click Finish.
View Environment
The environment will now start deploying and it will probably take about 15-20 minutes, so now's the time to get a ☕.
Once it's been created you will see the environment displayed under the organization, as shown in the screenshot below:
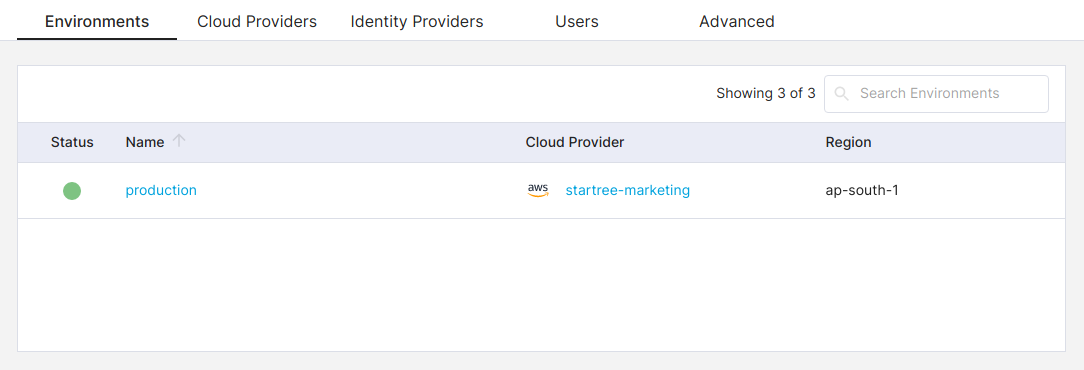 View organization
To see the environment, click on its name, which will lead to the following screen:
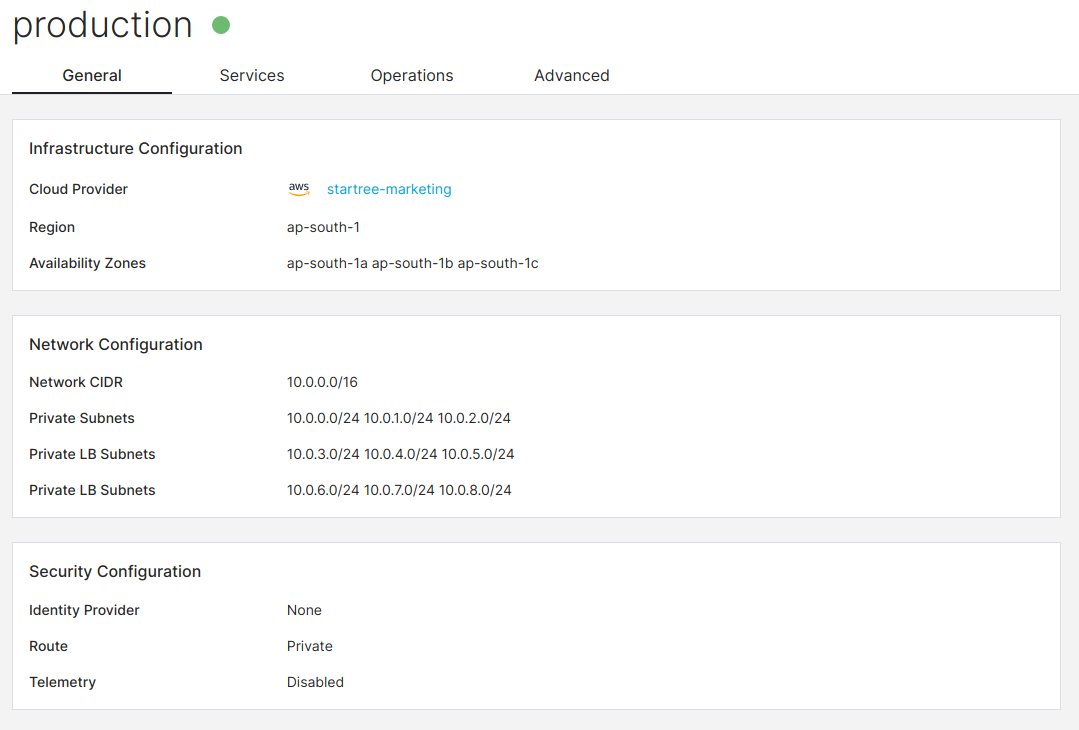 View environment
Click on the Services tab. There are several actions that you can take next:
- To configure a data source that you want to load into the Pinot cluster, click on the link next to the second My Apps label. You can learn more about the StarTree Data Manager in the Data Manager guide.
- To go straight to the Pinot Data Explorer (opens in a new tab), click on the link next to the cluster name.
- To see apps available to run against your Pinot cluster, click on the link next to the first My Apps label.