AWS Kinesis connector
Amazon Web Services (AWS) Kinesis is a fully managed service that stores and processes large streams of data in real time.
StarTree customers can use the Amazon Kinesis connector to create a table in Apache Pinot. As soon as the integration is set up, StarTree will automatically start to ingest data from the specified Kinesis data stream.
To begin, from the StarTree Data Manager overview page, click Create a dataset. Then, on the Select Connection Type page, click Amazon Kinesis.
Connect StarTree to Amazon Kinesis
Use one of the following methods to create a connection to AWS Kinesis:
- AWS access and secret keys
- AWS cross-account Identity and Access Management (IAM) roles
Both of these options require you to configure an AWS IAM policy first.
Configure AWS IAM policy
-
Open the AWS IAM dashboard, click Policies, and click Create policy.
-
Click the JSON tab and create the following policy, replacing my-stream-name with the stream name that you will use to establish the connection.
{
    "Version": "2012-10-17",
    "Statement": [
        {
            "Sid": "VisualEditor0",
            "Effect": "Allow",
            "Action": [
                "kinesis:ListShards",
                "kinesis:DescribeStream",
                "kinesis:GetRecords",
                "kinesis:GetShardIterator"
            ],
            "Resource": [
                "arn:aws:kinesis:*:*:stream/my-stream-name"
            ]
        },
        {
            "Sid": "VisualEditor1",
            "Effect": "Allow",
            "Action": [
                "kinesis:ListStreams"
            ],
            "Resource": [
                "*"
            ]
        }
    ]
}- Provide the Policy name, such as
kinesis-my-stream-policy, and click Create policy.
Select one of the connection creation options to continue.
Option 1: Create a connection using access and secret keys
You will need the following information to create a connection with Amazon Kinesis when using your AWS access key and a secret key pair.
- Region: The AWS region where the Kinesis stream resides. you can find this information in the Kinesis dashboard.
- Access & Secret Key: You can generate AWS Account and Access Keys in the AWS IAM console (opens in a new tab).
Create an AWS access and secret key pair
If you do not have an access key and secret key pair, follow these steps to generate one.
-
Open the AWS IAM console (opens in a new tab), click Users, and click Add users.
-
Enter a User name, such as
startree-my-stream-user, and click Next. -
Under Permission options, select Attach policies directly.
-
Use search to find the policy name you created earlier, it was
kinesis-my-stream-policyin our example. Click Next and click Create user. -
Return to the AWS IAM Dashboard, click Users, then select the user name that you just created, like
startree-my-stream-userin our example. -
Select the Security credentials tab and click Create access key.
-
Click Application running on an AWS compute service, click Next, and click Create access key.
-
Copy the Access key and the Secret access key from here and enter them in the Data Manager.
Continue in the Create dataset section.
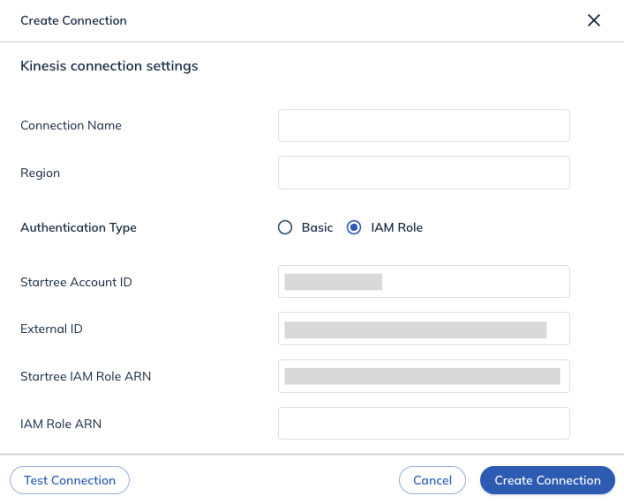
Option 2: Create a connection using AWS IAM roles
You will need the following information to create a connection with Amazon Kinesis when using AWS IAM Roles:
- Region: The AWS region where the Kinesis stream resides. You can find this information in the Amazon Kinesis dashboard.
- IAM Role ARN: The Customer-provided IAM Role ARN that will be assumed by the StarTree Data Plane.
Create an AWS IAM role
If you do not have an AWS IAM role, follow these steps to generate one.
-
Find the following information. You will need it in later steps.
- StarTree Account ID and External ID from the Data Manager UI.
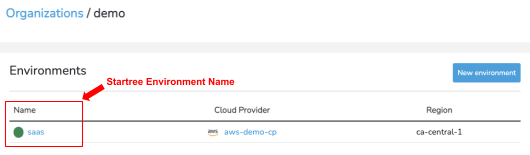
- StarTree environment name from the StarTree Cloud Portal.
-
Check your Security Token Service (STS) configuration
- Open the AWS IAM console (opens in a new tab) and click Account settings.
- If the Security Token Service (STS) is not currently in Active status for the region that you have Kinesis stream, set it to Active.
-
In the AWS IAM console, click Roles in the left menu bar, click Create role.
-
In the AWS IAM console, click AWS account for Trusted entity type.
- If your Kinesis stream and StarTree Data Plane run on the same account you are currently using to access the AWS IAM console, click This Account.
- If your Kinesis stream and StarTree Data Plane use a different account, from the StarTree Data Manager copy the StarTree AWS Account information and paste it into the Another AWS Account field. Then copy the External ID and paste it into the External ID field.
-
Use search to find the policy name you created earlier, it was
kinesis-my-stream-policyin our example. Click Next. -
Fill the Role details.
- Role name: Enter a role name, such as
startree-my-stream-role. - Tags: Enter a key-value pair.
- Key:
startree-environment-name - Value: This is the StarTree environment name found in the cloud portal from an earlier step.
- Key:
- Role name: Enter a role name, such as
-
Click Create role. Navigate to the Summary page. Copy the ARN field and enter it into the IAM Role ARN field in the Data Manager UI. Click Create Connection.
Continue in the Create dataset section.
Create Dataset
-
Select a Topic Name and Data Format to map the topic to the correct table.
-
(Optional) Record reader config is for Advanced Users to provide additional details about the source schema.
-
(Optional) Improve query performance by adding indexes to the appropriate columns and choose encoding types for each column.
-
(Optional) Configure unique details such as tenants, scheduling, data retention, and a primary key for upsert.
-
Click Next.
-
Check the details and preview data. When ready, click Create Dataset.